365ofpinterest


Leave a comment

Halloween costumes for twins – Scuba Divers!

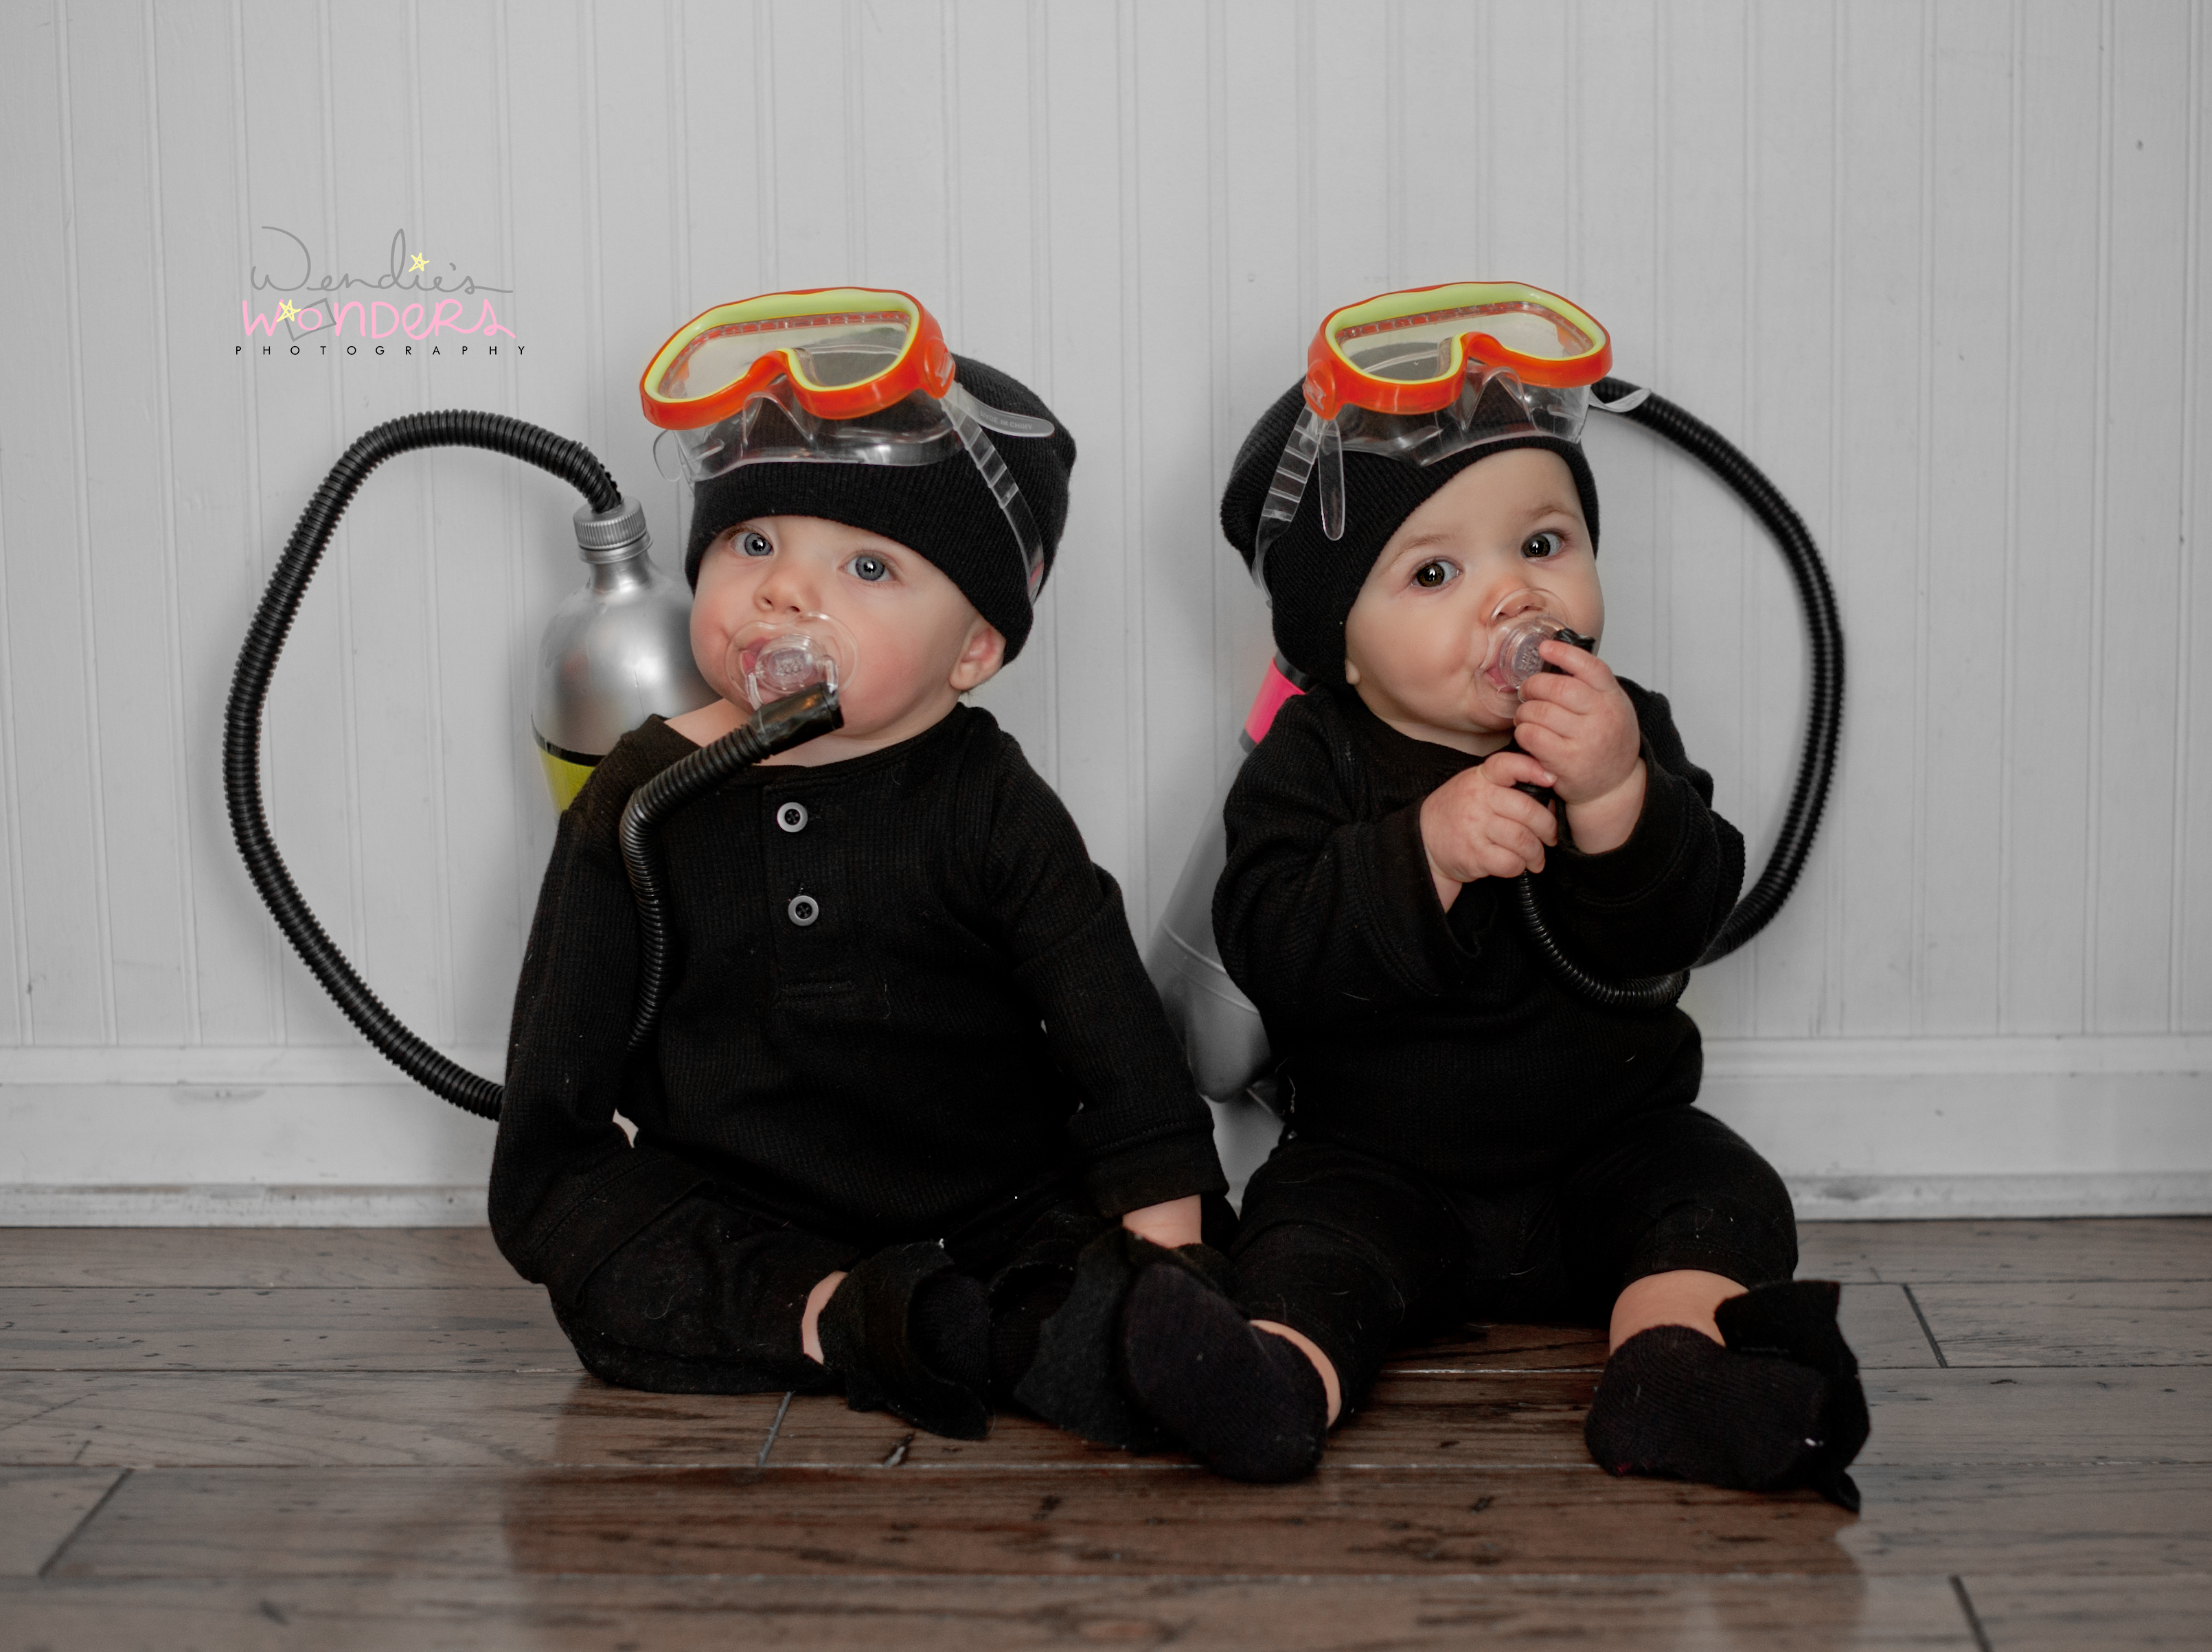
I was trying to come up with good Halloween costumes for my twins…then it hit me…scuba divers!!  These were super easy to make!  I think the whole project cost no more than $20.


WWP-7


Supplies:

WWP-1

I got the black clothes at Walmart – onesies, pants, hats, “socks”

Black felt – Walmart – used to make the flippers

Spray paint – Walmart

Duck Tape – Walmart and Dollar Tree

Black tubing – Lowe’s

Clear Pacifiers – Walmart

Goggles – Dollar Tree

Velcro – Walmart

2 Liter pop bottles


How I did it:

The pictures pretty much sum it up, but it was super easy!  All the clothes I got at Walmart.  The socks were actually mittens.  They were a two pack for 97 cents.  I cut off the thumbs and sewed it together so they were socks!  The goggles I got at the Dollar Tree.

First, I spray painted 2 liter pop bottles silver..  When they were completely dry, I put black duck tape around it and then another skinnier, brighter piece around that.  I got the skinnier neon colors at the Dollar Tree.  I then placed Velcro on the back of the pop bottles.  In the cap, I made a hole and took my black piping and shoved it in there.  It wasnt going anywhere so I didnt need to glue or tape it.  I then took the pacifier and used black duck tape to tape it to the end of the black piping.  I put velcro on the back of the twins shirts so secure the “tank”.

See how easy it was?  It was a big hit with all the neighbors!


WWP-9 WWP-2WWP-10WWP-11WWP-12WWP-3 WWP-4 WWP-5WWP-6  WWP-7


Leave a comment

Gift for dance teacher

Gift for dance teacher!


Supplies needed:


Paper for handprints

8×10 frame

Paint

Ribbon

Glue

Scrap paper


Instructions:


Paint your child’s hands and cross them so the thumbs will be sticking out.  Press firmly on the paper.  Allow to fully dry.  I got white scrap paper and painted it to match the color of her hand prints for the top of the tutu.  I then used Purple ribbon and glued it to hide where her hand prints and tutu top meet.  After it was dry I printed up a little paper that says “Miss Erin – Thank you for giving me the gift of dance!”  I also made a tag for her gift bag.


WWP-1WWP-1-3


Leave a comment

Birdcage Card Holder

Supplies Needed:

Bird Cage

Ribbon

Spray Paint

Flower

Embellishments

Hot Glue gun + glue


Instructions:

Spray paint the birdcage white. Wait a couple of hours for it to dry completely.

_WWP5501

Wrap your ribbon around the entire cage. I chose to use a thick ribbon and a thin, sheer ribbon on top of it.

_WWP5502

I tied them together to make a pretty bow.

_WWP5509 _WWP5504

I hot glued a flower to the top. Since this was for my twins baptism, I added crystal crosses to the flower and to the bow.

_WWP5549-2 _WWP5552-2_WWP5505


And here it is displayed at the Baptism:

_WWP5713-Edit _WWP5720-Edit


Leave a comment

DIY Communion or Baptism Invitations

I fell in love with some pretty fancy Communion invitations I saw on Etsy.  But being the crafty person I am, I knew I could do it myself for way cheaper than $8 a card!

WWP-4

Supplies:

Lace – Etsy

Mini Rosaries – Etsy

Silver Glitter scrapbook paper – Pat Catan’s

White Ribbon – Pat Catans

Jewel Embellishments – Michael’s

Printed Pearl paper – thru my professional lab

Glue Dots – Pat Catans

Tape – Walmart

Scissors

Paper Trimmer (not pictured)

Hot Glue gun (not pictured)


I ordered 5×7 press cards thru my pro lab and got them with a pearl finish.  This might be the only tricky part you may encounter if doing these yourself.  Mpix is a professional lab for consumers and they MIGHT have pearl press cards, but I can’t be sure.  I took the silver glitter scrapbook paper and cut it just a little bit bigger than 5×7 so it would make a nice border around the pearl card.  Take your printed card and wrap lace around it, the ends being on the back.  I used tape to tape it onto the back to hold it in place.  I then took a piece of plain white ribbon and did the same thing.  I had pre cut a bunch of them so I could just grab and not measure.  I had pre made bows using the white ribbon as well.  I used hot glue to glue the bow onto the ribbon.  I then used glue dots to attached the printed card onto the glitter paper.  I added the crystal embellishments to the curves on her name and boom, done.


Untitled-1


Leave a comment

Rainbow Loom Box Removable Decals DIY

Rainbow Loom Box Removable Decals DIY


Supplies Needed:


Puffy Paint

Plastic Sandwich Baggies

Paper

Pencil/pen

_WWP6375-Edit


Instructions:


Cut paper to size of baggie.  On the paper, draw a design you want to use on your box.  After you are done, place the paper inside of the baggie.


_WWP6376-Edit _WWP6377-Edit_WWP6380-Edit_WWP6381-Edit


Next, trace your design on the outside of the baggie using the puffy paint.


_WWP6378-Edit _WWP6379-Edit   _WWP6382-Edit


Let dry overnight!!!  Remove the design by carefully peeling it off the baggy.

_WWP6385-Edit _WWP6386-Edit _WWP6388-Edit


Place your decal on your rainbow loom box and there you go!  Easy removable, make as many as you want!

_WWP6387-Edit_WWP6390-Edit


Leave a comment

Motorcycle Diaper Cake

Ok, so this was my attempt to make a cute motorcycle diaper cake for a co-worker.  Although I wouldn’t say it was a fail, it def didnt come out as cute as I thought it would!


Supplies needed:

8″ round cake pan

34 Diapers

2 Rubber Bands

Ribbon of your choice

Pearlhead Push Pins

Two Swaddle Blankets

Bib

Bottle

Socks or Booties (optional)

Stuffed Animal (Optional)


DIRECTIONS:


Take half of the diapers (17) and put them into a pinwheel formation in the cake pan.  You use the cake pan to hold them or else they would be everywhere!  Once you have them all in place, place a rubber band around them to secure them.  I used a thin ribbon since I had no rubber bands!  DO this twice, once for each wheel.

_WWP5597_WWP5602


Next, place your ribbon around the “wheel” and secure with headpins.

_WWP5606 _WWP5618

You are now ready to assemble your wheels.  Take one of the receiving blankets and thread it thru the back wheel.  Tuck the other end to the front wheel.

_WWP5620

For the handlebars, thread the other receiving blanket thru the front wheel.  Make it even on each side and using a rubber band or ribbon, tie together and fold each side over to make the handles.

_WWP5621

Take your bib and place it over the fire “tire” and put the bottle under the handlebars.

_WWP5624-Edit

It is complete!  You can add a stuffed animal on it or socks on the handlebar ends if you want.

_WWP5625