
























First time doing this!
Supplies Needed:
Strawberries – the pointier the better!
Lollipop Sticks
White chocolate
Blue Sprinkles
INSTRUCTIONS:
Melt your chocolate the way you want. I used my melting pot.

Put aside a bowl of blue sprinkles.
While the chocolate is melting, put lollipop sticks in the tops of the strawberries (where the green stuff is).
When the chocolate is done melting, dip each strawberry three quarters of the way in the white chocolate. You might need a spoon to cover the missed spots.
Let it cool down a LITTLE, but NOT completely and then dip it a little bit in the blue sprinkles.
Repeat for each strawberry.
INSTRUCTIONS:


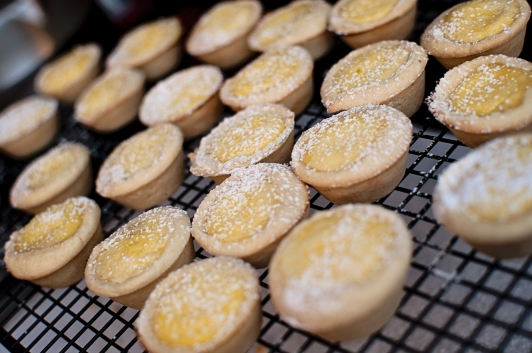

I want to say THANK YOU!! to Kitty from Sweet Sticks by Pada Cake for these AMAZING cake pops! I told her exactly what I wanted and she did it! CLICK THIS for her facebook page!
Supplies Needed:
Wilton chocolate disks (I used these because they work best in my melter)
Lollipop sticks
Box of Cake Mix
Can of frosting

INSTRUCTIONS:
Start by baking your cake as directed on the box. When it is done baking, let it cool completely. Break up the cake and crumb into a large bowl. You might want to cut off the edges if they are hard. When you crumble the cake, make sure the crumbs are FINE! Or else your cake pops will be lumpy.
Next, add in 1/2 can of frosting and mix. If it is not sticking together, add just a little bit more, but not the whole can or the cake balls will slide off the lollipop sticks.
Now it is time to get a lil messy! Make round balls out of the mix. When done, put them in the refrigerator for about an hour to chill.
While the cake balls are chilling, start melting your chocolate, and remember to stir!
After an hour, pull your cake balls out of the fridge two at a time (so they don’t get warm). Stick a lollipop stick in the chocolate and stick it half way into the cake pop. Wait about 30 seconds and dip your cake pop half way in the chocolate. Use a spoon to coat the missed spots and the chocolate drip off.
Decorate as you wish before the chocolate hardens! Refrigerate for 10 minutes and they are ready to be eaten!
These were another favor we used for our twins baptism.
Supplies Needed:
Bags of marshmallows (Depends on how many crosses you want to make)
Skewers
Sprinkles
Treat Bags
Ribbon
INSTRUCTIONS:
Take 4 marshmallows and place on a skewer. You will need to cut some skewers smaller and carefully for the crossbars. Place a crossbar thru the second marshmallow and place a marshmallow on each side. Using a brush, or your hand, or a paper towel, put water all over the fronts of the marshmallows. Sprinkle your decorations and tap off excess.
Bag and tie.
Supplies Needed:
Bird Cage
Ribbon
Spray Paint
Flower
Embellishments
Hot Glue gun + glue
Instructions:
Spray paint the birdcage white. Wait a couple of hours for it to dry completely.
Wrap your ribbon around the entire cage. I chose to use a thick ribbon and a thin, sheer ribbon on top of it.
I tied them together to make a pretty bow.
I hot glued a flower to the top. Since this was for my twins baptism, I added crystal crosses to the flower and to the bow.
And here it is displayed at the Baptism:
I fell in love with some pretty fancy Communion invitations I saw on Etsy. But being the crafty person I am, I knew I could do it myself for way cheaper than $8 a card!
Supplies:
Lace – Etsy
Mini Rosaries – Etsy
Silver Glitter scrapbook paper – Pat Catan’s
White Ribbon – Pat Catans
Jewel Embellishments – Michael’s
Printed Pearl paper – thru my professional lab
Glue Dots – Pat Catans
Tape – Walmart
Scissors
Paper Trimmer (not pictured)
Hot Glue gun (not pictured)
I ordered 5×7 press cards thru my pro lab and got them with a pearl finish. This might be the only tricky part you may encounter if doing these yourself. Mpix is a professional lab for consumers and they MIGHT have pearl press cards, but I can’t be sure. I took the silver glitter scrapbook paper and cut it just a little bit bigger than 5×7 so it would make a nice border around the pearl card. Take your printed card and wrap lace around it, the ends being on the back. I used tape to tape it onto the back to hold it in place. I then took a piece of plain white ribbon and did the same thing. I had pre cut a bunch of them so I could just grab and not measure. I had pre made bows using the white ribbon as well. I used hot glue to glue the bow onto the ribbon. I then used glue dots to attached the printed card onto the glitter paper. I added the crystal embellishments to the curves on her name and boom, done.